Vinyl Flooring Installation
Mastering Vinyl Flooring Installation: A Comprehensive Guide
Introduction:
Vinyl flooring has become a popular choice for many homeowners and professionals due to its durability, versatility, and aesthetic appeal. Whether you’re updating a room in your home or completing a commercial project, understanding the process of vinyl flooring installation is crucial to achieving a professional and long-lasting result. This guide will walk you through everything you need to know about vinyl flooring installation, from preparation to execution.
Why Choose Vinyl Flooring?
Vinyl flooring offers a host of benefits that make it a preferred option for various applications. It’s not only durable and easy to maintain but also comes in a wide range of styles, colors, and textures that mimic natural materials like wood and stone. Moreover, vinyl flooring is water-resistant, making it ideal for areas prone to moisture, such as bathrooms and kitchens.

Preparing for Vinyl Flooring Installation
Before diving into the installation process, it’s important to prepare the space properly. Proper preparation ensures that the vinyl flooring adheres well and lasts longer without issues such as bubbling or lifting.
Assessing the Subfloor
The first step in preparation is to assess the condition of the subfloor. The subfloor must be clean, dry, and level to ensure a smooth installation. Any imperfections, such as cracks or uneven areas, should be repaired before laying the vinyl flooring. In some cases, a self-leveling compound may be required to even out the surface.
Measuring the Area
Accurate measurements are crucial to avoid wastage and ensure that you purchase the right amount of vinyl flooring. Measure the length and width of the room, and multiply these figures to get the total square footage. It’s advisable to add an extra 10% to your measurement to account for any cutting or trimming required during installation.
Acclimating the Vinyl Flooring
Vinyl flooring needs to acclimate to the room’s temperature and humidity before installation. This process typically takes 24 to 48 hours. Simply lay the vinyl planks or sheets flat in the room where they will be installed, allowing them to adjust to the environment. This step helps prevent issues like expansion or contraction after installation.

The Vinyl Flooring Installation Process
Vinyl flooring can be installed using various methods, depending on the type of vinyl chosen. The most common types include vinyl sheets, vinyl planks, and vinyl tiles. Each type has its own installation process, which we’ll cover in detail.
Installing Vinyl Sheets
Vinyl sheets are ideal for large, open spaces. They come in rolls and are typically glued down to the subfloor. Here’s how to install vinyl sheets:
- Layout and Cutting: Start by laying out the vinyl sheet in the room to check for fit. Cut the sheet to size using a utility knife, leaving a slight excess around the edges for trimming later.
- Applying Adhesive: Once the vinyl sheet is cut to size, apply adhesive to the subfloor using a trowel. Work in sections to avoid the adhesive drying out before the vinyl is laid down.
- Laying the Vinyl Sheet: Carefully position the vinyl sheet over the adhesive, starting from one end of the room and working your way to the other. Use a roller to press the vinyl into the adhesive, ensuring there are no air bubbles.
- Trimming and Finishing: After the sheet is laid, trim the excess vinyl along the edges using a utility knife. Finish by installing baseboards or trim to cover the edges.
Installing Vinyl Planks
Vinyl planks are popular for their easy installation and the ability to mimic the appearance of hardwood flooring. Most vinyl planks use a click-lock system, making them suitable for floating installations. Here’s how to install vinyl planks:
- Layout and Planning: Start by laying out the planks to determine the best layout. It’s important to stagger the planks to create a natural look. Mark where the planks will be cut to fit around corners and obstacles.
- Click-Lock Installation: Begin installing the planks along the longest wall. Click each plank into place by aligning the tongue-and-groove edges and pressing down until they lock together. Continue this process, ensuring that the planks are snug and secure.

- Cutting and Fitting: Use a saw to cut planks to fit around corners, doorways, or other obstacles. Make sure to leave a small expansion gap around the perimeter of the room to allow for natural expansion and contraction of the flooring.
- Finishing Touches: Once all the planks are installed, trim any excess material and install baseboards to cover the expansion gap.
Installing Vinyl Tiles
- Vinyl tiles are a versatile option, offering the look of ceramic or stone with easier installation. These tiles can be glued down or installed as a floating floor, depending on the product.
- Dry Fitting: Lay out the vinyl tiles in the room without adhesive to determine the best layout. This allows you to see how the tiles will fit and if any adjustments are needed.
- Applying Adhesive: If using glue-down tiles, apply adhesive to the subfloor in small sections. Carefully place the tiles onto the adhesive, pressing them firmly into place.
- Click-Lock Installation: For floating vinyl tiles, align the edges and click them together as you would with vinyl planks. Ensure that each tile is securely locked in place before moving on to the next.
- Grouting (Optional): Some vinyl tiles are designed to mimic ceramic tiles and can be grouted for a more authentic look. If grouting, follow the manufacturer’s instructions for mixing and applying grout.

Common Challenges in Vinyl Flooring Installation
While vinyl flooring installation is relatively straightforward, there are a few common challenges that you might encounter. Knowing how to address these challenges can help ensure a smooth installation process.
Dealing with Uneven Subfloors
An uneven subfloor can cause vinyl flooring to buckle or develop gaps over time. To prevent this, use a self-leveling compound to even out the subfloor before installation. This will provide a stable surface for the vinyl and help prevent future issues.
Handling Complex Room Layouts
Rooms with complex layouts, such as those with multiple corners or irregular shapes, can be challenging. It’s important to carefully measure and plan the layout of the vinyl flooring before starting the installation. Consider using smaller planks or tiles in these areas to make fitting easier.


Preventing Moisture Damage
Moisture can cause significant damage to vinyl flooring, especially in areas like bathrooms and kitchens. To prevent moisture issues, ensure that the subfloor is completely dry before installation. Additionally, consider using a moisture barrier or underlayment in high-moisture areas to protect the flooring.
Maintaining Your Vinyl Flooring
After installation, proper maintenance is key to ensuring your vinyl flooring remains in top condition. Regular cleaning and care will help extend the life of your flooring and keep it looking its best.
Regular Cleaning
Vinyl flooring is relatively low-maintenance, requiring only regular sweeping and occasional mopping. Use a soft broom or vacuum to remove dust and debris, and mop with a vinyl-safe cleaner to keep the floor clean. Avoid using abrasive cleaners or tools that could scratch the surface.
Protecting the Floor
To protect your vinyl flooring from damage, place mats at entryways to reduce the amount of dirt and debris tracked onto the floor. Additionally, use furniture pads under the legs of chairs and tables to prevent scratches and dents.
Addressing Spills and Stains
Vinyl flooring is resistant to most spills and stains, but it’s important to clean up any spills promptly to prevent damage. For tougher stains, use a mild cleaning solution and a soft cloth to gently scrub the area.
Case Studies: Vinyl Flooring Installation in Singapore
To provide real-world insights, let’s look at a couple of case studies that highlight the successful installation of vinyl flooring in Singapore.
Case Study 1: Residential Renovation in Bukit Timah
In a recent renovation project in Bukit Timah, a homeowner chose vinyl flooring for their living room and bedrooms. The existing flooring was outdated and showing signs of wear, so the decision was made to install luxury vinyl planks that mimicked the look of hardwood. The installation process was completed in just two days, transforming the space into a modern, stylish home. The homeowner was particularly impressed with the durability and easy maintenance of the new floors.
Case Study 2: Office Space Upgrade in Raffles Place
A corporate office in Raffles Place underwent a major upgrade, including the installation of new vinyl flooring in the lobby and meeting rooms. The office management selected vinyl tiles with a stone-look finish to create a professional and elegant atmosphere. The installation was carried out over a weekend to minimize disruption to the business. The result was a sleek, modern office space that impressed both employees and clients.
Conclusion: Elevating Your Space with Vinyl Flooring
Vinyl flooring installation is a practical and stylish way to enhance any space, whether residential or commercial. By understanding the process, addressing potential challenges, and following best practices, you can achieve a flawless installation that will stand the test of time.
Whether you’re a homeowner looking to update your interiors or a professional seeking durable and attractive flooring options, vinyl flooring is a versatile solution that offers both beauty and functionality. If you’re ready to explore vinyl flooring options or need expert installation services, Dream Vinyl Flooring is here to help.
For more information on vinyl flooring options and professional installation services, visit Dream Vinyl Flooring. Discover the latest trends in Vinyl Flooring and transform your space with beautiful, durable flooring that lasts.


Korean Vinyl Flooring

Kitchen Vinyl Flooring

Bedroom Vinyl Flooring

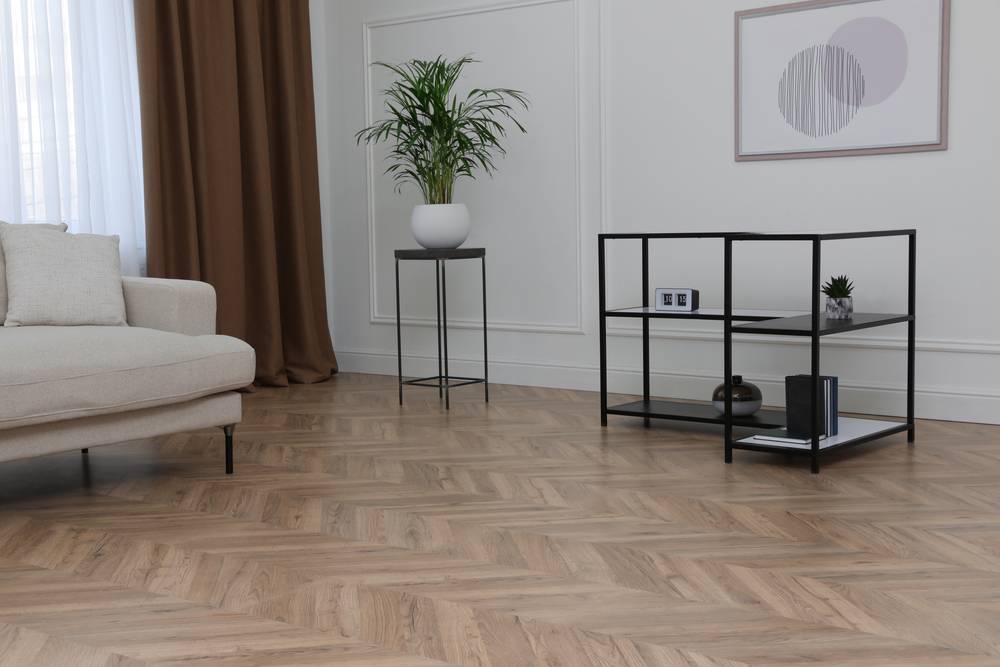
Living Room Vinyl Flooring
